
Woofrm – Login and Register Form Templates
For all purposes and websites.
Get started:
Follow our detailed step-by-step guide to unlock the full potential of your website and captivate your audience like never before.
Requirements:
- You must need the Latest Divi theme to use these Layouts.
- Install and activate the WooCommerce plugin. If this is your first time setting up WooCommerce, you must run through the basic setup wizard to prepare your store. Once you have done this, you are ready to add your new products.
- Create a few products if you don’t have any yet.
Customer Instructions for Enabling the Register Form:
Why Enable the Register Form?
To allow customers to create their accounts effortlessly, you need to activate the registration form in WooCommerce settings. Once enabled, it integrates seamlessly with your custom-designed toggle login-register form in Divi.
Instructions for WooCommerce Settings:
By default, WooCommerce doesn’t include a toggle switch between login and register forms. However, you can enable both forms on the My Account page.
Step-by-Step Guide:
- Log in to Your WordPress Dashboard:
- Use your admin credentials to access the backend.
- Navigate to WooCommerce Settings:
- Go to WooCommerce > Settings in the WordPress menu.
- Enable Account Registration:
- Click on the Accounts & Privacy tab.
- In the Account Creation section, enable the following options:
- “Allow customers to create an account on the ‘My Account’ page.”
- “Allow customers to create an account during checkout.”
- Save Changes:
- Scroll to the bottom of the page and click Save changes.
- Test Your Login-Register Toggle Form:
- Visit the My Account page on your site.
- Ensure that the toggle works correctly between the login and register forms.
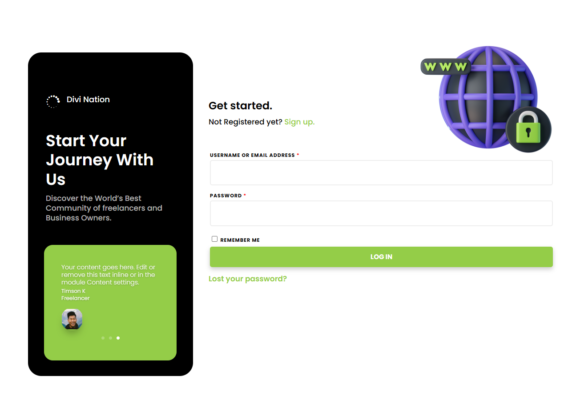
Where to Find the Toggle Form?
Your custom-designed login-register toggle form is available on the My Account page, styled with Divi for a modern and intuitive experience. Simply:
- Click “Register” to create a new account.
- Toggle back to “Login” if you already have an account.

File Structure:
What’s included in the downloaded file?
- Template-1.json
- Template-2.json
- Template-3.json
- Template-4.json
- Template-5.json
- Template-6.json
- Template-7.jsoN
- Template-8.json
- Template-9.json
- Template-10.json
- All Woocommerce Login_Register Templates.json
- license.txt
Installation Steps:
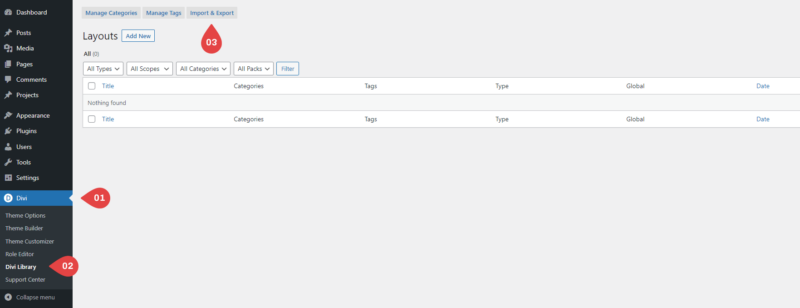
Step 1: Import Woofrm – Login and Register Form Templates:
- Navigate to your WordPress Dashboard.
- Go to Divi > Divi Library
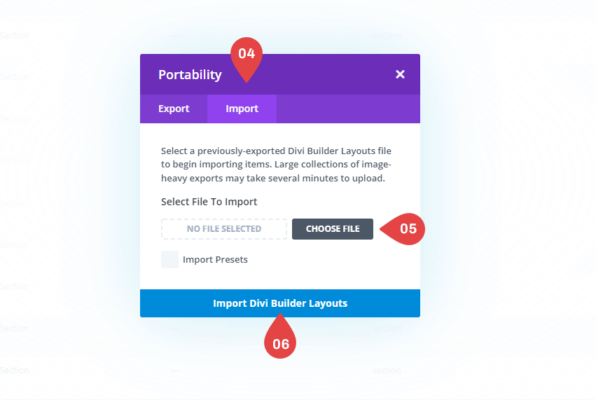
- Click on Import & Export and select “Import”.
- Choose the JSON file named All Woocommerce Login_Register Templates– in the Import tab.
- Click Import Divi Builder Layouts.
Step 2: To access these layouts inside a Woocommerce Account page:
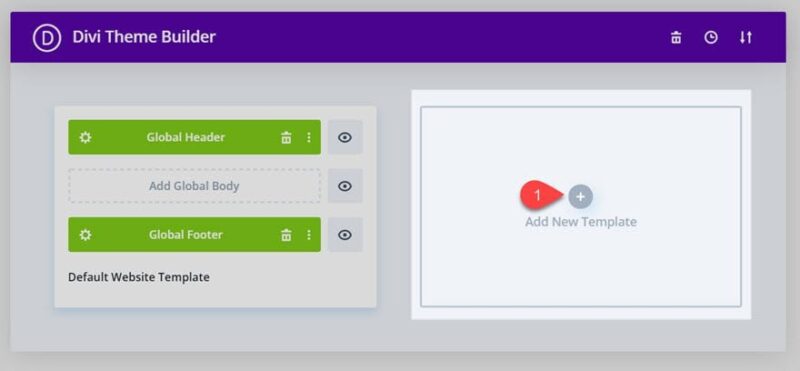
- Hover over the Divi Tab, then click “Divi Theme” Builder”.
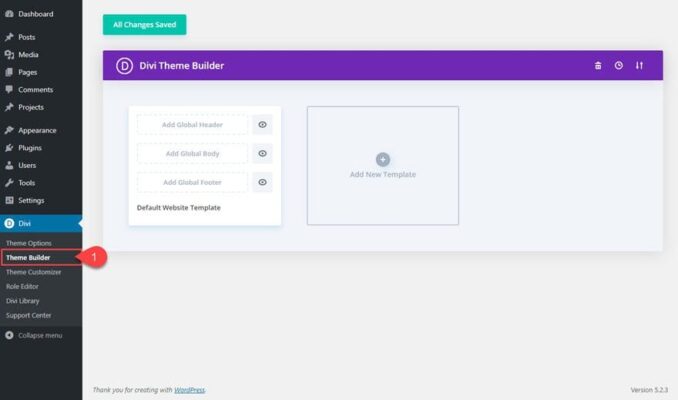
- Click “Add New Template.” Then Click “Build New Template.”
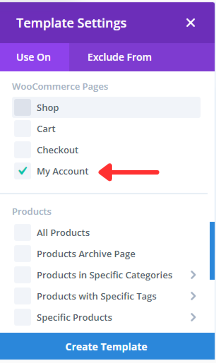
- Scroll Down & Select “My Account” ” from the WooCommerce Pages & then Click “Create Template.”
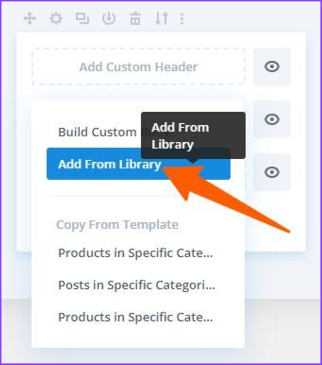
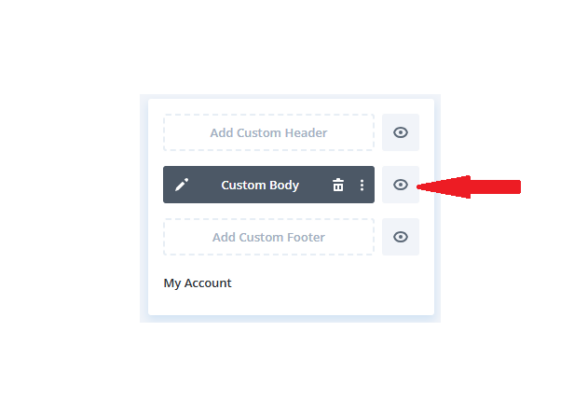
- Click “Add Custom Body” & then Click “Add From Library.”
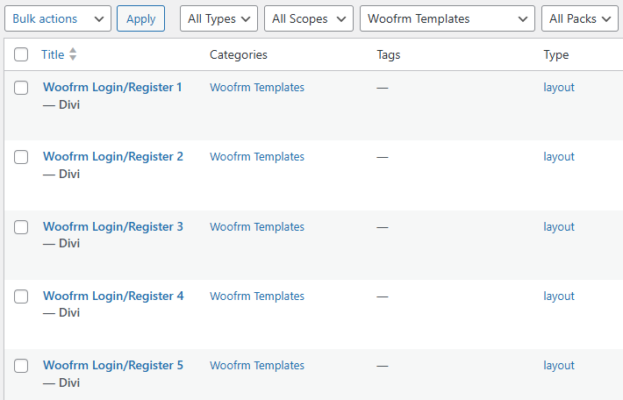
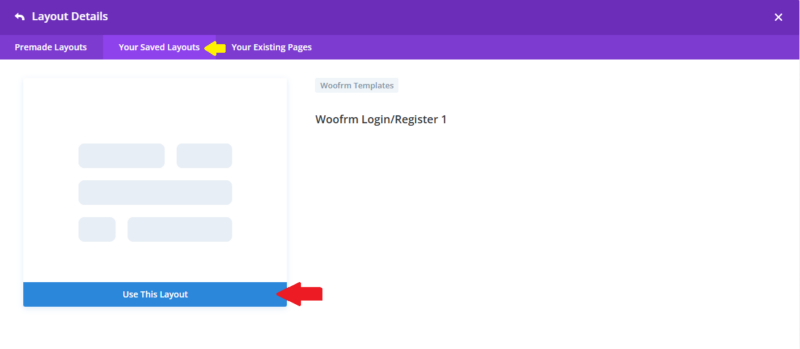
- Click “Your Saved Layouts.” Here, you can select the Layouts you’d like to use. Then click ‘Use This Layout.’
- From here you can edit your Design.
Images:
- All licensed Demo images will be automatically imported with a JSON file.
Note:
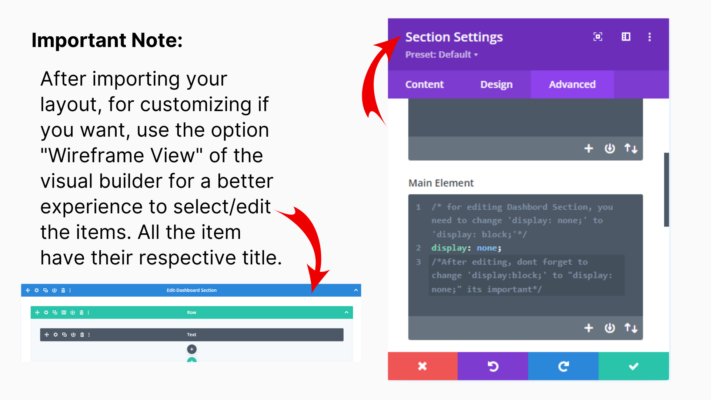
- After importing your layout, for customizing if you want, use the option “Wireframe View” of the visual builder for a better experience in selecting/editing the items. All the items have their respective title.
Troubleshooting Tips:
- Import Errors: If you encounter errors during import, ensure the .json file is not corrupted and try again.
- Library Overwrite: To avoid overwriting existing layouts, uncheck the Allow Import Overwrite option.
- Compatibility: Ensure your Divi theme and WordPress installation are up to date for the best compatibility with layout packs.
Product Support & Contact Information:
If you have any support-related or other questions, don’t hesitate to contact Divi Looks via the Support Ticket on our Author Profile. We’ll try our best to fix that as soon as possible. Thank You!
Product Customization Guide
Thank you for using our product! This guide will help you customize and resolve common styling issues in your Woofrm – Login and Register Form Layouts. Please follow the steps below and refer to the provided screenshots for easy implementation.
—
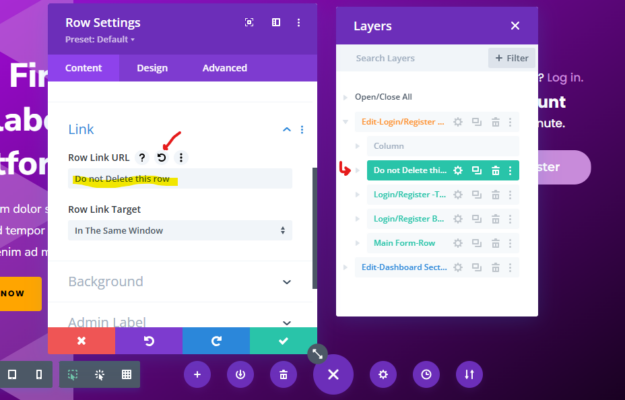
1. Removing Unwanted Clickable Links
If you notice an unintended clickable link in your layout, it may be due to a mistakenly added URL in the row settings. To resolve this:
– Go to the **Row Settings** in Divi Builder.
– Locate the **Row Link URL** field.
– Remove or refresh the URL to fix the issue.
– Refer to the provided screenshot for guidance.
—
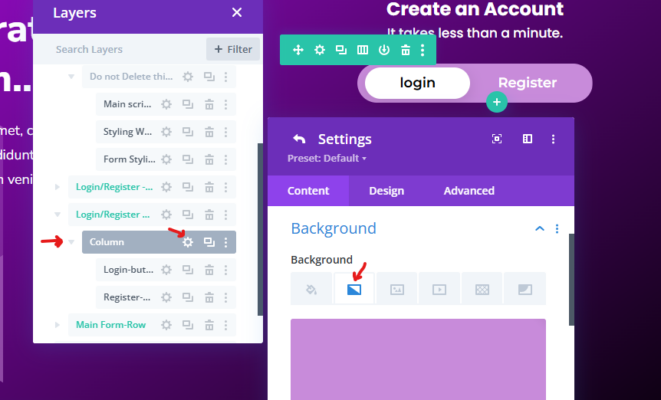
2. Customizing Toggle Login/Register Button Colors
To change the colors of the toggle Login/Register buttons, follow these steps:
1. Navigate to **Layers** in the **Divi Builder**.
2. Locate the section containing the Login/Register buttons.
3. Refer to the provided screenshot to identify the correct settings.
4. Adjust the button colors as needed in the settings.
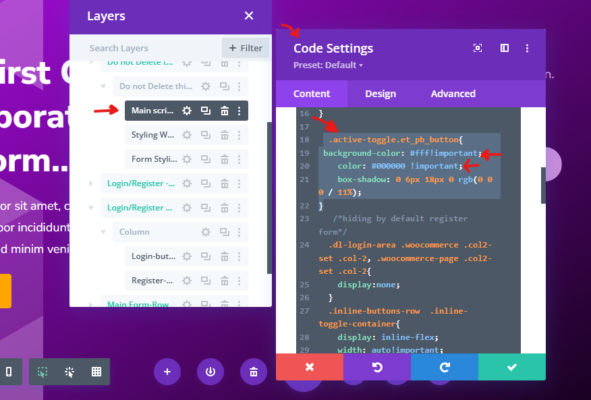
For further customization of the form buttons (Login and Register), follow these additional steps:
– Open the **Code Modules** in the respective section.
– Use the provided screenshot to find the highlighted area where colors can be changed.
– Update the necessary CSS to apply your preferred colors.
—
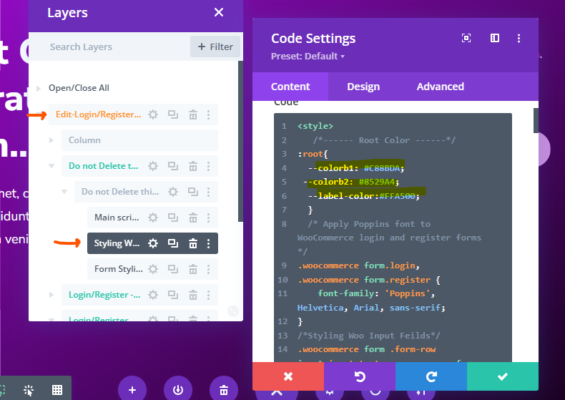
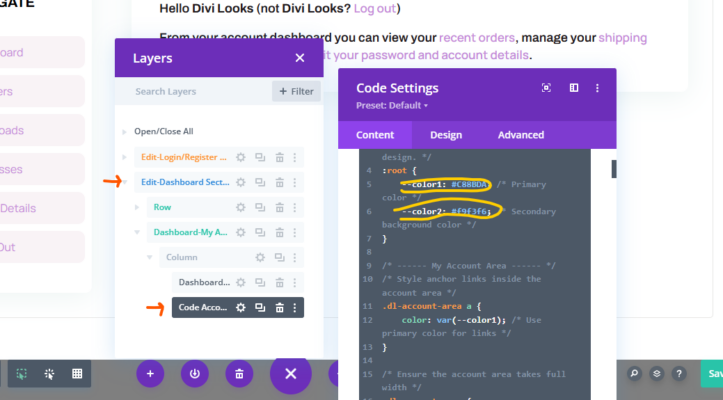
3. Updating Dashboard Button and Link Colors
If you need to modify the colors of dashboard buttons and links, follow these steps:
1. Go to the **Code Module** in the Divi Builder.
2. Locate the **CSS code** that defines the root colors.
3. Update the values to match your preferred theme colors.
4. Refer to the screenshot for the highlighted section where changes should be made.
This method ensures that all links and buttons on the dashboard reflect your custom color scheme effortlessly.
—
By following these steps, you can easily customize your Woofrm Layouts to match your desired design preferences. If you need further assistance, feel free to reach out to our support team.
Happy Designing!
Divi Looks
Copyright © 2022 – Divilooks
Made by Divi Looks